Conveyor Belts in Phaser 3
- cedarcantab
- Apr 28, 2022
- 6 min read
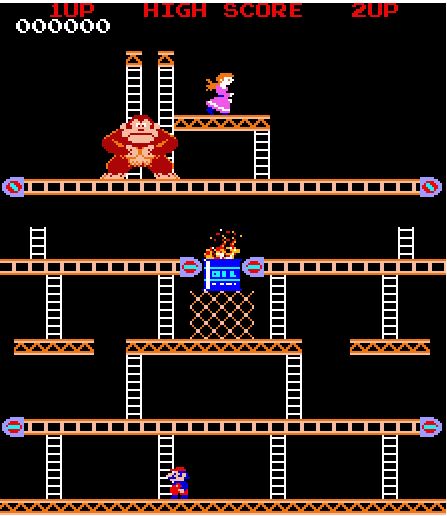
Having looked at moving platforms and ladders, I take a look at conveyor belts, as found in the classic Donkey Kong game (the very original). In it, the conveyor belt will either move to the left or to the right, and Mario will be carried along with it, affecting his speed depending on whether he runs with it or against it.
The final example code of this post (pictured below) builds on the ladder climbing code created in this post here.
Using Arcade Physics collision detection
The basic attributes of a conveyor belt are:
detect when an object is on top of it
when there is an object on top of it, move it in the predetermined direction, but do it in such a way as to "supplement" or "decrement" the existing velocity of the object.
In itself, the above mechanics are relatively easy to implement and I can imagine a number of different ways of implementing such a mechanism. Intuitively, it seems sensible to create both the conveyor belt and the object to be carried along, as sprites with Arcade Physics bodies. Then the collision detection for (1) and the manipulation of velocities can both be achieved easily with the Arcade Physics engine.
Creating a Conveyor Belt object as extended Arcade Sprite
The Conveyor Class I created is as follows. It is actually an extended TileSprite, hence in addition to the position (x,y), requires the width and height of the overall conveyor belt (w,h). To give the illusion of movement, the "wheels" at either end of the conveyor belt are created as sprites with simple rotating animation.
class Conveyor extends Phaser.GameObjects.TileSprite{

  constructor(scene, x, y, w, h) {
    super(scene, x, y, w, h, 'conveyor');
    this.scene = scene;
    scene.add.existing(this);
    this.setOrigin(0);
    scene.physics.add.existing(this, true);

    this.surfaceSpeed = new Phaser.Math.Vector2(0.5,0);
    this.leftWheel = this.scene.add.sprite(x,y-1,'wheel').setOrigin(0,0)
    this.rightWheel = this.scene.add.sprite(x+w, y-1, 'wheel').setOrigin(1,0).setFlipX(true);
    this.reverseTrigger;

  }
Speed of the conveyor belt
this.surfaceSpeed is the speed of the belt, which is set to any speed you want using the setSpeed method associated with the class.
I have used a vector2 but only the x parameter is used in my example. A positive x will move the conveyor belt to the right, and negative x will move it to the left. The unit is pixels per refresh, but it can easily be converted to pixels per seconds, like in Arcade Physics, by multiplying surfaceSpeed by delta time in each refresh.
moveWheels method simply sets the wheel animation turning in the correct direction.
  setSpeed(x = 0.5) {
    this.surfaceSpeed.set(x,0);
    this.moveWheels();
    return this;
  }
Switching the direction of the conveyor belts
The reverse method can be called to reverse the belt's direction.
  reverse() {
    this.surfaceSpeed.negate();
    this.moveWheels();
  }
Finally, I have included a setAutoReverse method which sets a timer event to switch the direction of the belt at fixed intervals, as determined by cycle parameter (in milliseconds).
 setAutoReverse(cycle) {
    this.reverseTrigger = this.scene.time.addEvent({
      delay: cycle,
      repeat: -1,
      callback: this.reverse,
      callbackScope: this
    })
  }
In the original arcade game, conveyor belt apparently switches direction whenever Donkey Kong is all the way to the left on his conveyor belt. I have not included such a mechanism, but it would be easy to achieve using the reverse method.
Creating the actual conveyor belts and the colliders
The actual conveyor belts are created and added to a group for convenience, like so.
   this.conveyors = this.add.group();

    var conveyor
    conveyor = new Conveyor(this, 70,70,8*10, 8);
    conveyor.setSpeed();
    this.conveyors.add(conveyor);
Then a collider is created between the conveyor belts group and the object to ride the conveyor belt.
this.physics.add.collider(this.mario, this.conveyors, this.surfaceEffect);It is the callbak function surfaceEffect that does the job of moving the object on top of the conveyor belt in the required direction and specified speed. The important bit is the line highlighted in red - this "adds" surfaceSpeed (the speed of the conveyor belt, as defined earlier as Vector2) to the arcade physics body position. There is also a check to make sure that the object is on top of the conveyor belt, as opposed to say, touching from the bottom.
surfaceEffect(object, belt) {
if (belt.body.touching.up && object.body.touching.down) {
object.body.position.add(belt.surfaceSpeed);
}
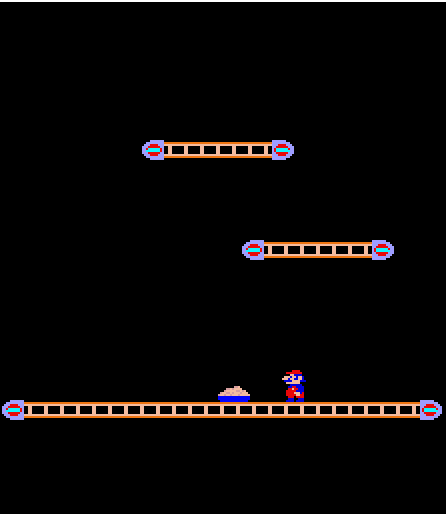
}And that's the basic logic behind my implementation of conveyor belts. The bare bones are included in the example code below.
Integrating the conveyor belt into a game environment
Introducing a mechanism created in isolation like above into an environment where other mechanisms exsit, typically results in a lot of complications. For this example I wanted to combine the ladder climbing mechanic (explained here) with the conveyor belt mechanic.
I had built what I believed to be quite a generic ladder climbing code; nevertheless I ended up having to amend quite a bit of the code to make it work in conjunction with conveyor belts. Specifically, the bits that required tinkering were around how to handle the character climbing "through" the conveyor belt to come on top of it, and when the character climbs down from a ladder onto a conveyor belt.
Killing the collision detection when Mario is climbing up and through the conveyor belt
Just as with the platforms, we need to allow Mario to climb through the platform when climbing up the ladder and onto the conveyor. This can be achieved by including the same processCallback function, as per the collider created for platforms (remember the conveyor belts are not created in the tilemaps, but separately created as extended tilesprites).
this.physics.add.collider(this.mario, this.conveyors, this.surfaceEffect,this.checkXSection, this);The bit that I had to change substantially from the ladder climbing code from an earlier post was the handling of moving up and down the ladder, and in particular when Mario is at the top or bottom of the ladder.
Taking a look at the blue highlighted code first, in the previous version of the code, when Mario reached the bottom of a ladder and could not go down any further, he simply stopped, in the climbing state. In this version, I force Mario to go into walking state, as it would look odd if Mario was moved along by the conveyor belt in his climbing posture.
        else if (this.scene.cursors.up.isDown)
        {
          if (this.isLadder(this.getCenter()))
          {
            this.anims.play('climb', true);
            this.body.setVelocityY(-40);
          }
          else {
            if (this.isScaffolding(this.getBottomCenter()))
            {
              this.setStatus(Mario.Status.PushUp);
            } else
            {
              this.body.stop()
              this.anims.stop()
            }

          }
        }
        else if (this.scene.cursors.down.isDown)
        {
          if (this.isLadder(this.getBottomCenter()))
          {
            this.anims.play('climb', true);
            this.body.setVelocityY(40)
          } else  {
            this.anims.stop();
            this.body.setVelocityY(0);
            this.setStatus(Mario.Status.Walking);
          }
        }
        else
        {
          this.anims.stop()
          this.body.setVelocityY(0);
        }
        break;
Handling of Ladders that end in the middle of nowhere
In the original arcade game, there are ladders that extend and retract periodically. When the ladder is retracted, Mario cannot climb to the next platform/conveyor belt (I did not have the energy to recreate the extending ladder - they are permanently in the retracted position). In previous version of the ladder climbing code, Mario automatically went up into the "push himself up onto the platform" state when the end of the ladder is reached. Hence I had to add a bit of code to check whether there is actually a platform/conveyor belt to push himself up onto from the ladder. That is the red highlighted code above.
The pushing up onto platform code cannot be interrupted
As with the situation at the bottom of the ladder, I have now made the "pushing up onto platform" automatic - when Mario has completed lugging himself up onto the platform/conveyor belt above, he will automatically change into Walking state. I made this change since I did not want the conveyor belt to push Mario along in "mid-cycle".
The code to handle the PushUp status is now a lot simpler than the previous version, since there is no checking of keys to cycle through the animation, and the code to reverse through the animation has now all been deleted.
    case Mario.Status.PushUp:

        if (this.pushUpAnimFrame <7)  {
          this.pushUpAnimFrame +=0.25;
          this.setFrame(Math.floor(this.pushUpAnimFrame));
          this.y-=0.25;
        }
        else
        {
          this.body.stop()
          this.anims.play('walking', true);
          this.setStatus(Mario.Status.Walking);
        }
Building the game scene
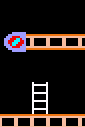
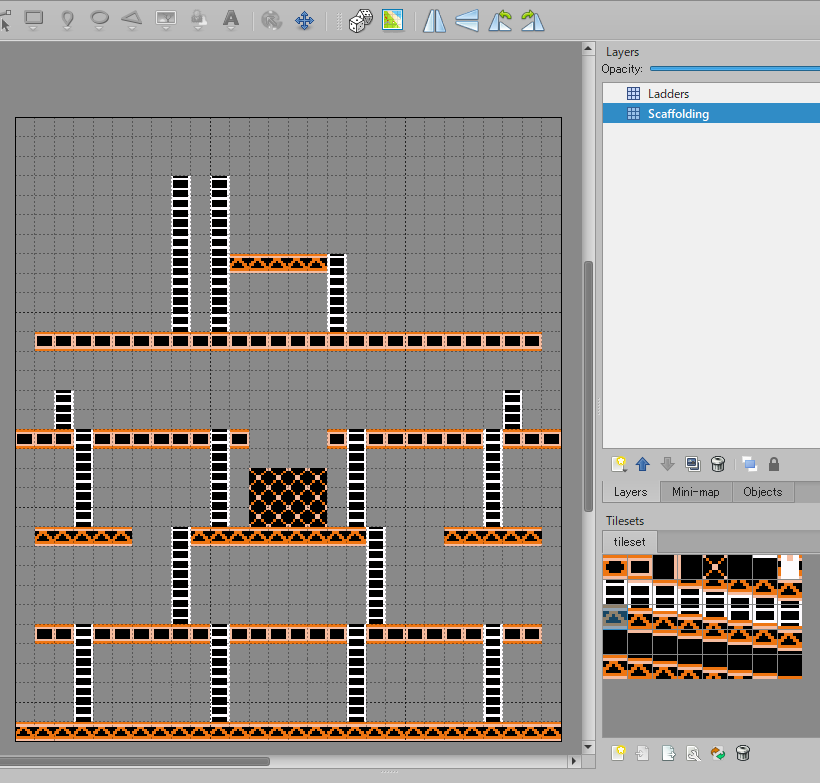
I built the ladders and platforms using TILED, as per my Climbing Ladders using Phaser 3 example; creating a layer for ladders and scaffoldings respectively. The tops of the ladders "overlap" the scaffolding, although they will be "drawn" before (beneath) the scaffolding.
Note that, although I have drawn the conveyor belts in TILED, they are purely cosmetic placeholders to facilitate the creation of the complete map - the conveyor belts are created as tilesprites.
I set collision for only the scaffolding tiles (tile# 17 and #33 - they are the same) and did not set collision for these conveyor belt tiles. As the conveyor belts are created as tilesprites, setting collisions for the conveyor belt tiles will confuse matters as they would overlap with the tilesprites.
Example Code
Otherwise, the basic logic of building this example is much the same as the Climbing Ladders example.


Comments