Climbing Ladders in Phaser 3, Part 3
- cedarcantab
- Apr 23, 2022
- 5 min read
Updated: May 1, 2022
In this post, I finish off this series on my exploration of making characters climb ladders, by looking at making character climb ladders that do NOT poke out above the platform, in tilemaps. Whilst the majority of the logic is the same as the previous example, the handling of player character at the top of the ladder is quite different.
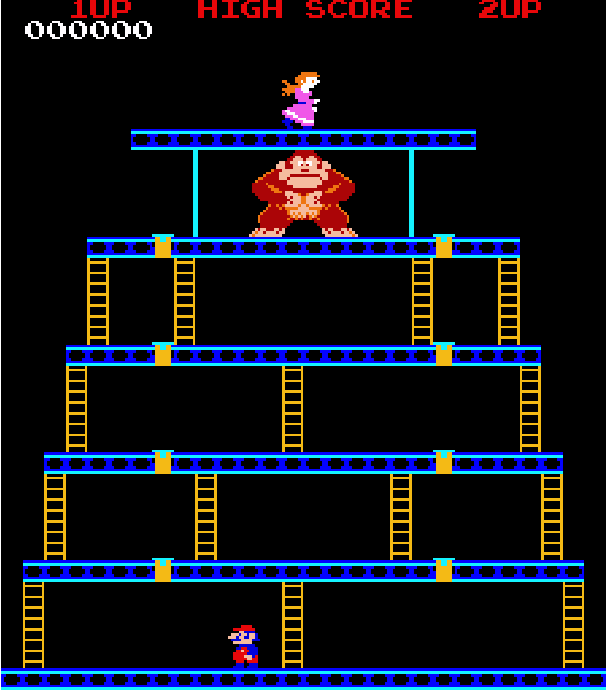
Climbing TileMaps Ladders that do not poke out above platforms
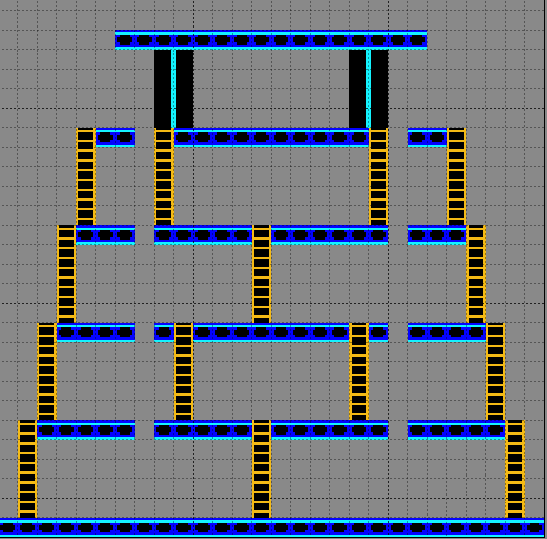
As with the previous example, I have created separate layers for the platforms (scaffolding) and the ladders respectively, in TILED.
Where the ladders and scaffolding intersect, the tiles are actually drawn so they overlap.
The tilemap is then created as follows.
  this.map = this.make.tilemap({ key: 'map', tileWidth: 8, tileHeight: 8 });
    const tileset = this.map.addTilesetImage('tileset1','tileset');
    this.ladders = this.map.createLayer(1, tileset, 0, 0);
    this.scaffolding = this.map.createLayer(2, tileset, 0, 0); // layer index, tileset, x, y
    this.map.setCollision(1, true, true, this.scaffolding);
The ladders layer is created "before" the scaffolding layer. The later created scaffolding layer will be dislpayed on top of the ladders where they intersect. Hence it will look like the ladders top end below the scaffolding, as in the picture at the top of this post.
Although the above code is pretty much the same as the previous example, there is one important difference - which is the order in which the ladders and the "platform" layers are created. In the previous example, the platforms layer was created before the ladders layer (and hence ladders were drawn over the ladders). Crucially, this meant that the ladders layer was the "current" layer, hence in checking for ladder tiles using getTileAt..type of methods, I did not have to specify the layer, whereas in this example we do (as we will see later).
The rivets are created from an object layer.
this.rivets = this.physics.add.group({allowGravity: false,});
this.map.filterObjects('Rivets', (obj) => {
         this.rivets.create(obj.x, obj.y, 'rivet').setOrigin(0,1).body.setSize(8, 32).setOffset(0,-16);
       });
Mario, Lady and Kong are all created as extended arcade physics sprites and colliders are created between the characters and the scaffolding layer.
  this.physics.add.collider(this.mario, this.scaffolding, null, this.checkXSection, this);
    this.physics.add.collider(this.mario, this.rivets, this.unRivet, null, this);
    this.physics.add.collider(this.kong, this.scaffolding)
    this.physics.add.collider(this.lady, this.scaffolding)
Checking intersections
The process callback of the collider between Mario and the scaffoldings is as follows:
  checkXSection(mario, tile) {

    return !(
     ((mario.status === Mario.Status.Climbing) || (mario.status === Mario.Status.Walking && this.cursors.down.isDown && mario.canClimb(mario.getBottomCenter())))
   )
  }
The logic is exactly the same as the previous example, except the bits highlighted in red. The canClimb method of the previous example simply checked whether the centre of the character overlapped with a ladder tile and whether the left and right sides of the physics body was within the width of the ladder. In this example, the bottomCenter() is specified as the position to check for the existence of a ladder tile (bottomCenter is the very bottom edge of the hitbox - I should probably be checking a little bit below the hitbox, but this seems to work). I had to do this, because when Mario is standing on top of a platform and wants to go down onto a ladder, he is NOT actually overlapping with a ladder, as in the previous example, hence the need to check the tile below Mario. In hindsight, this version of the code should have been used for the previous example also.
Note also, all the parameters of the getTileAtWorldXY method have to be specified in this method, in order to ensure that the correct layer is being looked at. If the layer is not specified, it will be assumed that we are looking at the scaffoldings layer, which was created last.
 canClimb(position) {
    const tile = this.scene.map.getTileAtWorldXY(position.x,position.y, true, this.scene.cameras.main, this.scene.ladders);
    const isLadder = (tile.index === 9);
    return (
      isLadder && (this.body.left>=tile.pixelX && this.body.right<=tile.right)
    )
  }
What to do at the top of the ladder?
In the previous example, the player could climb up as long as the top of his head (physics body) was below the top of the ladder. Once he got there, he just could not climb any further. You could then either climb down, or move left/right and enter walking state.

With the example of this post however, the same logic would mean that the character would be stuck, like so, because there is no ladder above the platform;
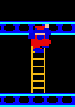
There is a variety of ways of handling this. The simplest way is to let the character climb until the bottom of his feet (bottom of the physics body) is right up against the top of the ladder, then foribly make the character "hop" to above the platform (and change to Walking state). This would be the simplest way.
In this example code however, I have tried to simulate what happens in the "original game", which is that when Mario gets half way up the platform, he enters into another animation and "pushes" himself up. I have used 8 frames to simulate the effect. You could simply go through these 8 frames automatically when Mario gets to a certain position, with no input allowed by the player. In my example, I have retained the ability for the player to effectively "cycle through" the animation either forward or backwards by pushing the up or down arrow keys.

Detecting when to change from Climbing to PushUp state
By introducing the above, the code becomes considerably more complex than the previous example. First, within the Climbing State, the following code has been introduced to look after the player pushing the up or down arrow keys. In particular, the blue highlighted code is where things are different from the previous example. Additional check has been introduced such that if the up arrow key is pressed and the character's center (middle of the sprite) has reached the top of the ladder, "PushUp" state is entered.
   else if (this.scene.cursors.up.isDown)
        {
          if (this.isLadder(this.getCenter()))
          {
            this.anims.play('climb', true);
            this.body.setVelocityY(-40);
          }
          else
          {
            this.setStatus(Mario.Status.PushUp);
          }
        }
        else if (this.scene.cursors.down.isDown && this.isLadder(this.getBottomCenter()))
        {
          this.anims.play('climb', true);
          this.body.setVelocityY(40)
        }
        else
        {
          this.anims.stop()
          this.body.setVelocityY(0)
        }
Handling the character pushing himself up onto the scaffolding
This is handled by the following red highlighted code:
In essence, I have created a variable called this.pushUpAnimFrames to keep track of which "frame" of the "pushup" animation, the character is currently in. This is cycled in 0.25 increments (ie 4 screen refresh to move to the next frame) which seems to give the right sense of speed.
I am sure there are more elegant ways of handling this, but for me, this is the simplest to understand.
  case Mario.Status.PushUp:

        if (this.scene.cursors.up.isDown && (this.pushUpAnimFrame <7))  {
          this.pushUpAnimFrame +=0.25;
          this.setFrame(Math.floor(this.pushUpAnimFrame));
          this.y-=0.25;
        }

        if (this.scene.cursors.down.isDown)  {
           if (this.pushUpAnimFrame >0)
           {
             this.pushUpAnimFrame -=0.25;
             this.setFrame(Math.floor(this.pushUpAnimFrame));
             this.y+=0.25;
           }
           else
           {
             this.setStatus(Mario.Status.Climbing)
           }

         }
         if (this.scene.cursors.right.isDown && (this.pushUpAnimFrame ===7)) {

          this.setVelocityX(60);
          this.setFlipX(false)
          this.anims.play('walking', true);
          this.setStatus(Mario.Status.Walking);
        }
        else if (this.scene.cursors.left.isDown && (this.pushUpAnimFrame ===7)) {
          this.setVelocityX(-60)
          this.setFlipX(true)
          this.anims.play('walking', true);
          this.setStatus(Mario.Status.Walking);
        }
The blue highlighted code handles the situation where the player presses right or left arrow keys when the character is in PushUp state. Essentially, left or right arrow key presses are ignored unless the end of the push up animation cycle has been reached. If we are already at the end of the pushup animation cycle, then the character is allowed to go into Walking state.
There's a bit of extra code to display Kong and the Lady on screen but they don't do anything.
And that's pretty much it of my exploration into climbing ladders in Phaser 3.
The example code is accessible here.


Comments