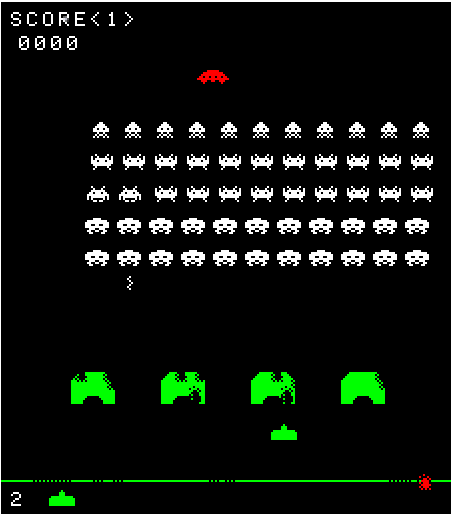
Space Invaders in Phaser 3 (Part 1): Structuring the Game Code
- cedarcantab
- Jan 9, 2022
- 4 min read
Updated: Jan 17, 2022
Having played the game in the arcades in my teenage years a lot, I needed to understand the game logic. There are numerous tutorials on creating space invader like games out there, I wanted to understand (to some extent) how the original worked and try to figure out how to recreate something similar - afterall, this project is for myself to learn about programming.

In that regard, there is remarkable site called Computer Archeology ("CA") which posts disassembly of classic arcade games - including Space Invaders - here. It even has a lot of commentary on the logic!
Understanding how 'old' screens work
Taking a look at the "sprite-sheets" presented the immediate challenge - the images are very very small. This is not altogether surprising given that the "resolution" of screens back in the day are nothing like those of today. CA gives the following description.
Video
The raster resolution is 256x224 at 60Hz. The monitor is rotated in the cabinet 90 degrees counter-clockwise.
The screens pixels are on/off (1 bit each). 256*224/8 = 7168 (7K) bytes.
The "scan lines" of CRT monitors travel from left to right, starting from the top-left corner. In otherwords, in the original hardware, (0,0) is the top left hand corner and the last point (256, 224) the bottom-right corner. Since the screen is rotated anti-clockwise, (0,0) is the bottom-left corner of the screen and (256,224) is the top right corner of the screen. So, when looking at the original Z80 code, increasing x-coordinate means going up the screen (ie decreasing y) in Javascript world and increasing Y-coordinate means means moving right (increasing x) in the Javascript world - very confusing!
Another site here talks about the aspect ratio of CRT monitors of the day, stating that a CRT "pixel" is slightly wide than it's tall - since the monitor is rotated, each "pixel" is taller than wide.
Anyway, what this means is that if we print the image of an alien from the original sprite sheet, 1) the alien will look squat and flat, and 2) very small.
We can live with (1) but (2) is a bit of a problem. Thankfully, Phaser has a neat feature in game config which allows you to "scale" the enter screen.
const config = {
  width: 224,
  height: 256,
  backgroundColor: 0x000000,
  zoom: 2,
  pixelArt: true,
  physics: {
    default: "arcade",
    arcade:{
        debug: false
    }
  },
  scene: [BootScene, StartScene, PlayScreen, MainGame]
};

SCREEN_WIDTH = config.width;
SCREEN_HEIGHT = config.height;

new Phaser.Game(config);
How to structure the code
As you see from the above game config, I have ended up creating 4 scenes: 1) "BootScene" to load in all the assets, 2) StartScene to display the "attract mode" screen, 3) "PlayScreen" which is basically a scene to display the "heads-up-display", and 4) "MainGame" for the game engine. For a relatively simple game like Space Invaders, I could have created it all in one scene, but after much experimentation, I found the above combination easy for myself to understand and maintain.
class Invaders extends Phaser.Physics.Arcade.Group {
	constructor(scene, config) {
    super(scene.physics.world, scene, config);
  }
}

class Invader extends Phaser.Physics.Arcade.Sprite {
  constructor(scene, x, y, texture, col,row) {
  super(scene, x, y, texture);
    this.scene = scene;
    scene.add.existing(this);
    scene.physics.add.existing(this);
    this.setActive(false).setVisible(false);
  }
}

class Saucer extends Phaser.Physics.Arcade.Sprite {
  constructor(scene, x, y) {
    super(scene, x, y, 'saucer');
    this.scene = scene;
    scene.add.existing(this);
    scene.physics.add.existing(this);
    this.body.collideWorldBounds = true;
    this.body.onWorldBounds = true;
    this.setActive(false).setVisible(false);
    this.status;

  }
}

class Player extends Phaser.Physics.Arcade.Sprite {
  constructor(scene, x, y) {
    super(scene, x, y, 'player');
    this.scene = scene;
    scene.add.existing(this);
    scene.physics.add.existing(this);
    // when initially instantiated, set to invisible
    this.setActive(false).setVisible(false);
    // set body's collider world bounds to true so that the player cannot be moved outside the screen
    this.body.collideWorldBounds = true;
    this.status;
  } // end of constructor
} // end of Player class


class Bullet extends Phaser.Physics.Arcade.Sprite {
  constructor(scene, x, y) {
    super(scene, x, y, 'playerBullet');
    this.scene = scene;
    scene.add.existing(this);
    scene.physics.add.existing(this);
    this.setActive(false).setVisible(false);
    this.status;
  }
} // end of Bullet Class


class Bomb extends Phaser.Physics.Arcade.Sprite {
 // There are three different alien bomb types: "rolling", "plunger" and "squiggly".
 // "Rolling": Always dropped from the alien nearest to the player.
 // "Plunger": Dropped from a predefined alien columns list and is not used when there is only one alien left.
 // "Squiggly": Dropped from a predefined alien columns list and is not used when the flying saucer is being shown.
  constructor(scene, x, y, texture) {
    super(scene, x, y, texture);
    this.scene = scene;
    scene.add.existing(this);
    scene.physics.add.existing(this);
    this.setActive(false).setVisible(false);

  }
}


class Ground {
  // ground is simply a 1 pixel wide line at the bottom of the screen
  constructor (scene) {
    this.scene = scene;
  }
}

class BootScene extends Phaser.Scene {
  constructor () {
    super('bootScene');
  }
}


class StartScene extends Phaser.Scene {
  constructor() {
    super('StartScene')
  }
}

class PlayScreen extends Phaser.Scene {
  constructor() {
     super('PlayScreen')
  }
}

class MainGame extends Phaser.Scene {
  constructor() {
    super('MainGame');
  }
}
Finally, a reference to the following piece of code in the original, which will give us a clues when looking into how the game objects were created in the original game. RAM from $2000-20BF are filled with lots of variables used by the game, and these are very well documented in CA. The initial settings for these variables can be determined by looking at what's held in the ROM from $1B00. For example, $2010-$201F holds various information for the player object. Therefore, the initial settings can (I think) be confirmed by looking at $1B10.
CopyRAMMirror:
; Block copy ROM mirror 1B00-1BBF to initialize RAM at 2000-20BF.
;
01E4: 06 C0           LD      B,$C0               ; Number of bytes
01E6: 11 00 1B        LD      DE,$1B00            ; RAM mirror in ROM
01E9: 21 00 20        LD      HL,$2000            ; Start of RAM
01EC: C3 32 1A        JP      BlockCopy           ; Copy [DE]->[HL] and return
Here's the above code in CODEPEN (it obviously does not do anything since it's just a bunch of empty classes).


Comments