Phaser Coding Tips 8 "Sprite Motion Paths Tutorial" Revisited, Part 3
- cedarcantab
- Mar 30, 2022
- 5 min read
Continuing on from the previous post about my exploration of Phaser 3's capabilities to generate splines and motion paths, and using tweens to move sprites along those paths. In this post I explore Phaser 3's PathFollower object.
Path Follower object
Phaser 3 goes a step further to make life easier for those wanting to move sprites along a path by providing a dedicated game object that acts like a normal sprite but with associated methods to make it follow a path with ease.
The below is the alien flying along the spline but with the alien instantiated as a Path follower object.
They part of the code is below.
    this.alien = this.add.follower(this.curve, 30, 300, 'alien')
    this.alien.startFollow({
      duration: 5000,
      repeat: -1,
      rotateToPath: true,
    });
And that's it. No setting of coordinates in the update loop.
A bit more detail on how Pathfollower follows the path
In fact, looking at the code "beneath-the-hood" reveals that Phaser is using a number tween to move the alien along, just like the last example of the previous post, within a method called pathUpdate.
The method is using getPoint rather than getPointAt. For this reason if you make a Pathfollower follow a Curves.Spline object, it will not move at a constant speed. getPoint of a Curves.Path object appears to work like getPointAt of the Curves.Spline object, and hence the Pathfollower will move along a Curves.Path at a constant speed, as illustrated by the earlier example. On the other hand, if you move a sprite along a Phaser.Curves.Spline, the sprite will not move at a constant speed, as illustrated by the following example, where the car whizzes along the straight at some considerable speed and slows down to snails pace round the corners - looks kind of fun, but not the intended result.
(Coding Tips 8, Part 3.1)
Without meaning to belabour the point, the path follower object should be used with Phaser.Curves.Path object, as opposed to Phaser.Curves.Spline object, although the game object will move along the Spline.
Interestingly there is the following code within the pathUpdate method that ensures that the object is positioned correctly at the end of the path, when the tween is complete. Perhaps because of this it is sometimes tricky to stop the Pathfollower behaving like a path follower, and act like a normal sprite, since when it is not moving, it can get "stuck" at the end of the path, even if one uses the stopFollow() method.
          if (tweenData.state === TWEEN_CONST.COMPLETE)
            {
                this.path.getPoint(1, pathVector);

                pathDelta.add(pathVector);
                pathVector.add(this.pathOffset);

                this.setPosition(pathVector.x, pathVector.y);

                return;
            }
For those wanting to know more about the path follower object should go to the many excellent examples here. In particular, I would highlight the following important methods and properties:
setPath(path [, config]: You can set a particular path when you instantiate your game object, like in the above example, or you can separately set the path using this method. It simply sets the property this.path of the Pathfollower object to the given path. Although this post has talked about Phaser.Curves.Spline object (Pathfollower object will quite happily follow such a Phaser.Curve object), the PathFollower object is designed to follow a Phaser.Curves.Path object.
pathOffset: If the object is created not on the path when it starts following, then the object will move at a relative offset to the path. This is particularly useful since (i) you don't have to worry about the absolute positioning of the curve within the game screen when you first create it and/or if you want your different game objects flying the same pattern but not necessarily from the same starting point
isFollowing(): tells you if the object is current following a path. This is simply using isPlaying() method on the underlying tween
pathTween: the config appears to accept a lot of the properties of a "standard" tween, like yoyo, and ease (not surprising I guess, as the object is creating tweens in the background, which can be accessed as one of the object's properties)
pathDelta: this is the "distance" the follower has travelled from the previous point to the current one, at the last update. More specifically, it is displacement since the last frame, returned as a vector.
Moving game objects in parallel along a path
What if you, in the race track above (which has 3 "lanes") wanted to say, have a car travel along the "outside lane"? Perhaps the pathoffset property is useful in this regard?
PathOffset: How it works
The official Phaser documentation explains the pathOffset property of a path follower as follows.
An additional vector to add to the PathFollowers position, allowing you to offset it from the Path coordinates.
Clearly, this is useful if you want your game object to move in a pre-determined pattern but not necessarily from the same position each time.
However, turning to the moving cars in parallel tracks problem, the starting point of the middle lane is {460, 398} and the distance between each lane is 18 pixels so what if I set the initial position of the car to {460, 418} and set the positionOnPath property to false? The result is close, but not quite what we want. The pathOffset is always {0, +18} hence the car travels along the outerlane when it is travelling in the lane at the bottom of the screen. However, when it is moving vertically, it travels in the middle lane, and when it is moving left on the top part of the circuit, it moves along the inner lane.
Dynamic pathOffset property
To achieve the effect of having the car travel in "parallel" to a closed path, you need to adjust the pathOffset according to the "normal" of the direction of the path (the tangent) and shift the position 18 pixels in that direction (and of course yes, the simpler solution might be to simply create 2 other curves.path objects for the inner and outer lanes).
I achieved the desired effect with the following code:
  pathUpdate() {
    const tween = this.pathTween;
    if (tween && tween.isPlaying()) {
      const t = tween.getValue();
      this.path.getPoint(t, this.pathVector);
      this.path.getTangent(t, this.tangent);
      this.setRotation(this.tangent.angle());
      this.pathVector.add(this.tangent.normalizeRightHand().setLength(this.pathOffset));
      this.setPosition(this.pathVector.x, this.pathVector.y);
    }
  }
Changing the speed of travel
And what if we wanted to change the speed of travel of our car along the race track?
Specifying the speed as opposed to the duration of travel
As far as I can tell, there is no way to explicitly set the speed of the path follower object; just the duration to travel the entire path.
However, since there is a method that can tell you the distance of a path object, you can in effect determine the speed of the object's travel by dividing the distance by the required speed, and set the tween duration based on that.
Specifically, the race track is approximately 3,388 pixels, so we could specify the speed by changing the duration of the tween to give the desired velocity (eg if we set the tween duration to 10,000, speed would be approximately 339 pixels per second).
But what if we wanted to change the speed during traversing the curve? Accelerate or decelerate? It might be possible to do this by dynamically changing the tween duration. However I think the easiest way would be to manually increment 't', by an amount that can be 'adjusted'. In essence, the increment would be the speed, and the amount by which to change the velocity is acceleration. With this in mind, it is easy to code so that one can change the speed of the car with the up and down arrow keys, such as below.
pathUpdate() {
const tween = this.pathTween;
if (tween && tween.isPlaying()) {
this.t = tween.getValue();
} else {
this.speed = Phaser.Math.Clamp(this.speed + this.acceleration, 0, this.maxSpeed);
this.t = this.t + this.speed <= 1 ? this.t + this.speed : 0;
}
this.path.getPoint(this.t, this.pathVector);
this.path.getTangent(this.t, this.tangent);
this.setRotation(this.tangent.angle());
this.pathVector.add(this.tangent.normalizeRightHand().setLength(this.pathOffset));
this.setPosition(this.pathVector.x, this.pathVector.y);
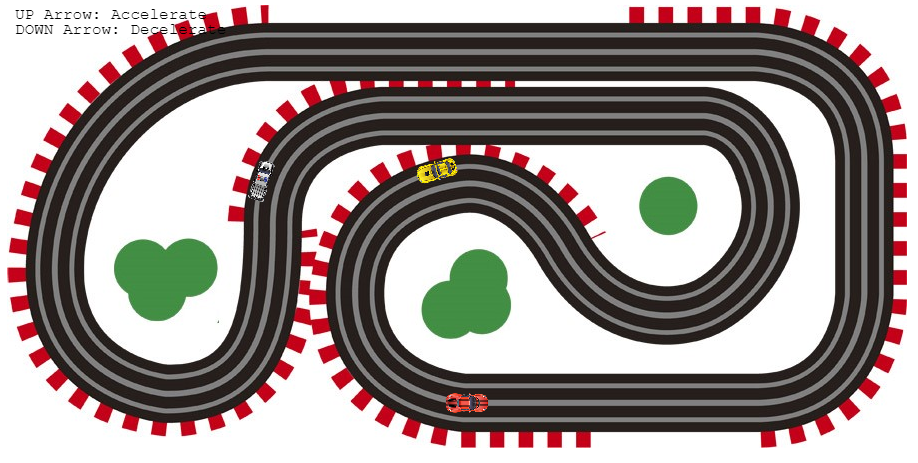
}Scalextric !
And based on all of the above, I have created a simple demo of a car that you can accelerate and decelerate with the up and down cursor keys, accessible in the Codepen below.
(Coding Tips 8, Part 3.2)


thanks, it helps me a lot.