Phaser Coding Tips 7 Revisited: Creating a Shoot-em-up Tutorial
- cedarcantab
- Feb 4, 2022
- 7 min read
For those new to the art of creating shoot-em-up games using Javascript/Phaser framework like me, there is a fantastic tutorial here by Richard Davey. This post is about my attempt at converting the original Phaser 2 based tutorial to Phaser 3, and adding enemies that you can shoot at.
Phaser Coding Tips 7 "Creating a Shoot-em-up Tutorial"
The original tutorial was posted on 23 February 2015 and hence written in Phaser 2 and ES5 (I think). I first set about converting the Phaser 2 code to Phaser 3, using ES6 syntax.
If you are a relative beginner starting afresh with Phaser 3 like me, you might find it useful to read the original tutorial in conjuntion the conversion below. Even for a beginner like me, I can tell that the original code is very elegantly coded and I have attempted to convert it into Phaser 3 while maintaining the structure of the code as closely as possible. As such the original tutorial text should make sense without much additional commentaries.
The only material difference is the player object - I have created an extended sprite class and stuck most of the input handling code into that class - but that is not the main purpose of the tutorial and there is not much description of it in the tutorial anyway, so hopefully this will not detract.
Not a difference as such but more a case of using methods that were not available in Phaser 2 are the bits to do with rotating the sprites. For example I did not have to use Math.atan2 as there are easier to understand methods in Phaser 3.
Adding enemies to shoot at!
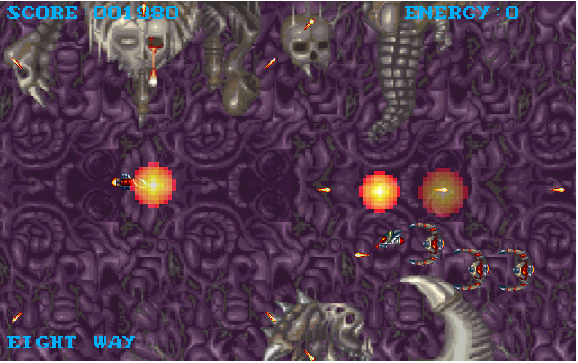
I know that the purpose of the original tutorial is to show how you can shoot lots of bullets. However, it seems such a shame that there is nothing you can actually shoot at! So I set out to add some enemies that the player can shoot at, as well as enemies that fire back at the player. I added sound, explosion effects and score rendering. Please look at the resulting code at the Codepen below.
Of course such additions in themselves does not make a complete game but rather it did confirm to me how powerful the Phaser 3 framework is, as all of the additions was completed in a very short period, despite my relative lack of programming experience. I did in the process make some changes to the structure of the original code which are described below.
Amalgamating the bullet pools into one
In the original code, separate bullet groups were created for each bullet shooting pattern. This made the code very readable.
However, in my modified version (the newly created Bullets Class shown below) I have created one bullet pool class called Bullets, then separate bullet pools are created for i) the player, and (ii) the enemy (enemies). For me, it just made it a little bit easier to code the collision detection.
class Bullets extends Phaser.Physics.Arcade.Group {
  constructor(scene, maxBullets) {
    // Call the super constructor, passing in a world and a scene
    super(scene.physics.world, scene);
		this.createMultiple({
      classType: Bullet,
			key: ('bullet5'),
			frameQuantity: maxBullets,
			active: false,
			visible: false,
    });
    // disable the body of all bullets - otherwise they will overlap with the inactive aliens and cause explosion
    this.children.each((bullet) => bullet.disableBody(true,true)); // is there a way to do this via createmultiple config?
  }
Specifically, I have added a new parameter maxBullets so that you can specify the number of bullets to create (since I don't need to many for the enemies).
I have also added the blue line to disable the bodies when the bullets are first created. Unless I include this, an explosion is trigerred at the top-left hand corner of the screen when the code is first run. This is (probably) because as the bullets are created at {0,0}, and the enemies are also created at {0,0}, the player bullets and the enemies "overlap" causing the hitEnemy code. I have a strong suspicion that there is a way to do this within the createMultiple config, but perhaps not as I have seen other people including properties such as below in the config, to achieve the same affect.
setXY: {
    x: -1500,
    y: -1500
  }
Slight changes to the Bullet class
The above then required me to pass the image texture of the bullet as a parameter to the fire method, and the texture to be set each time a bullet is fired. Consequently, it is also necessary to reset the size of the bullet game object each time.
  fire({x, y, angle = 0, speed, gx = 0, gy = 0, tracking = false, texture = 'bullet5', scaleSpeed = 0, target = null}) {
    this.scene.shootSFX.play();
		this.enableBody(true, x, y, true, true);
    this.setTexture(texture).setSize()
As the bullet group is now a separate class of its own, the weapon classes are no longer extended from the Phaser group.
I did start off coding the weapon classes to accept the bullet pool and the object to shoot from as parameters, expecting to utilise the same classes to make the enemies shoot. However, I realisedhalf-way through coding that given the position that the bullets originate from are "hard-coded" based on the player, it would require substantial re-writing - hence I gave up.
As in the original code, I have not included any checking to see if there is actually a bullet available to be fired. The fireRate settings together with the total number of bullets created for the pools mean that the player can never fire so many bullets as to use up all the bullets; however it's probably good practice to include such a check as a matter of course.
Deleting bullets that fly out of the screen
In the original code, onWorldBounds event is used to disable bullets. This is a very elegant way to make the bullets disappear when they fly off the screen. However, I replaced this code with one that checks whether a bullet has flown completely off screen (as opposed to when a bullet touches the edge of the screen) before disabling the sprites. In the event, you really can't tell the difference as the bullets are flying too fast for the human eye to see.
Spawning enemies
Firstly, I have "poached" some textures (I think from the same series as the player sprite of the original tutorial - is this from an actual arade game??) for the enemies, from the Phaser github site here.
I have created 3 enemy types as extended Phaser sprites. I simply use Phaser timers to spawn an enemy at a random height off the right edge of the screen, and give them velocities pointing left. For example, the spawning logic for "Baddie1" is as follows:
All it does is to choose a random Y-coordinate between 0 and the height of the screen. The x-coordinate is slightly off the right hand side of the screen. Then the y-component of the velocity is set; here, I make sure the enemy veers towards the centre of the screen depending on which half the screen the enemy is in terms of the y-axis. The x-component of the velocity is also given a random element so that the enemies don't all fly at the same speed towards the player. Finally, drag is added in the y-axis so that enemy does "keep" traversing" across the y-axis but kind of "fall-in" to a horizontal flight pattern.
  launchEnemy() {
    const enemy = this.getFirstDead(false);
    if (enemy) {
      const startY = Phaser.Math.Between(0, HEIGHT);
      enemy.enableBody(true, WIDTH + enemy.displayWidth, startY, true, true)
      enemy.body.velocity.y = startY > HEIGHT/2 ? Phaser.Math.Between(-200, 0) : Phaser.Math.Between(0, 200);
      enemy.body.velocity.x = -Phaser.Math.Between(Baddie1.SPEED-50, Baddie1.SPEED+50);
      enemy.body.setDragY(50); // if useDamping is false, this is the absolute draft in pixels per second
    }
    this.launcher = this.scene.time.delayedCall(Phaser.Math.Between(this.launchDelay, this.launchDelay + 1000), this.launchEnemy, [], this);
  }
Tweens to make enemy flight look dynamic
The above spawning code makes enemies look a bit more dynamic than all flying at the same speed horizontally. I attempted to use tweens to "animate" Baddie3, like so:
   this.rotateTween = scene.tweens.add({
      targets: this,
      scaleY: 0.1,
      duration: 1000,
      yoyo: true,
      repeat: -1
    });
I was actually attempting to make the enemy look light they are rotating along the x-axis as they flew across the screen - the above definitely doesn't achieve that - I suspect I need to use the right type of easing, and probably more than one - if anyone can tell me how to do it, I would be very grateful!! Or may be it is simpler simply to use animation in the traditional way using sprite sheets and multiple frames.
Different flight patterns
To add more dynamism and variety, I play around with the y-coordinate as the enemies fly across the x-axis from right to left.
For example, for Baddie2, I added the following one line to make the enemy fly in a wave.
this.y = this.startingY + Math.sin((this.x) / this.wave.frequency) * this.wave.amplitude;Of course, you could more elegantly achieve the above using Tweens, but I wanted to play around with manually adjusting the sprite position using trigonometry.
Making the enemies shoot
I added code so that Baddie1 shoot horizontally across the screen, and Baddie3 shoot at the player. I did this in a very crude way, as follows.
In the preupdate function, the following is included to call the this.shoot method at fixed intervals (I include a check to stop the enemy shooting when they are too close to the left hand side - typically where the player is).
   this.shootTimer += delta;
    if (this.shootTimer > Baddie3.SHOOT_DELAY && this.x > 300) {
      this.shootTimer = 0;
      this.shoot();
    }
The shoot method is as follows. All it does is to call the fire method of the bullet class directly with the necessary parameters.
  shoot() {
    const bullet = this.scene.enemyBullets.getFirstDead(false);
    if (bullet) {
      bullet.fire({x: this.x, y: this.y, angle: 180, speed: 300, texture: 'baddieBullet', target: this.scene.player})
    }
You will note that I have added an extra paramter to the very original code, namely the target. The following is the amended section of the fire method of the bullet class. If there is a target specified, moveToObject method is used to make the bullet fly in the direction of the player.
if (target) {
      this.scene.physics.moveToObject(this, this.scene.player, speed)
    } else {
      this.scene.physics.velocityFromAngle(angle, speed, this.body.velocity);
    }
bitmap Font
I have had to replace the fontset used in the original tutoria code with another one, since the original font set did not include numbers - and I wanted to display the score. I found a suitably "retro arcade" type font (again from the Phaser examples) but it was white. I used character tint to give it a colour that looks vaguely similar to the original tutorial font..but frankly, it looks naff. Unfortunately, this is the limit of my artistic capability.
Conclusion
I surprised myself at how quickly I could add the above functionalities, despite my relative inexperience in coding. It is a certainly testament to the power of the Phaser 3 framework.


Comments