Danmaku Interlude Part 8: Explosions using Particle Emitters
- cedarcantab
- Sep 13, 2021
- 4 min read
Updated: Apr 15, 2022
In the previous post I descirbed how I used sprites to create the effect of explosions.
Another way of creating explosion effects is by using Phaser's powerful particle emitter system (and before you ask, I may look into using Phaser's particle emitter to create the danmaku spawner itself at some point).
Phaser's particle emitter is very flexible and powerful. It has a lot of parameters to play with so rather than try to describe the system and create the required explosion effect from 'ground up', I have once again, borrowed from the Phaser Discourse blog, here.
The relevant code, to be inserted in the create function is as below.
particles = this.add.particles("bullet7"); // create particle manager
explosion = particles.createEmitter({
//(above 2 lines can be amalgamted into explosion = this.add.particles("bullet7").createEmitter({
    scale: { start: 1, end: 5, ease: "Cubic.easeOut" },
    alpha: { start: 1, end: 0, ease: "Cubic.easeIn" },
    blendMode: 3,
    frequency: -1,
    lifespan: 1500,
    radial: false
  });
And the following line is inserted into the relevant overlap events.
explosion.setSpeedY(0.2 * _bullet.body.velocity.y).emitParticleAt(x, y)And that's it. As I said, there is a lot of parameters to configure the particle emitter and I have not gotten anywhere close to understanding all of it (in fact I don't even know what percentage of the total functionality I understand). Anyway, the official Phaser documentation regarding the particle object is available here and for the particle emitter, here.
The rest of the post is me documenting my (shallow) understanding of particle emitters.
Particles, Particle Manager and Particle Emitter
There are 3 key components to make an explosion out of Phaser's particle emitter system. According to the docs;
A Particle is a simple Game Object controlled by a Particle Emitter and Manager, and rendered by the Manager. It uses its own lightweight physics system, and can interact only with its Emitter's bounds and zones.
In other words, you need a "Manager" to draw the particles, and a "Emitter" to tell the particles how to behave, and the whole system has its own light weight physics engine, so I guess is faster than using lots of sprites with arcade physics bodies.
Make sense? Working backwards from the example code...
Loading the texture for the particle
Very first thing we need to do is to prepare a texture to be used for the particles. In our example we use the image used for the bullets, hence necessary code to load is already in the preload function. Specifically, "bullet7.png" (key = "bullet7") which is an orange circle, is used.
Create Particle Manager
Assuming you already have the texture loaded in the preload function, you need to create a particle manager. This is done using scene.add.particles(), passing the relevant particle texture key as the parameter. The relevant line in our example is:
particles = this.add.particles("bullet7"); Create Particle Emitter
Then we need to create a particle emitter. A particle emitter represents a single particle stream. It controls a pool of Particles and is controlled by a Particle Emitter Manager. Hmmm.. Let's look at the specific properties of our example.
scale: { start: 1, end: 5, ease: "Cubic.easeOut" }
Scale is set to move from 1 (original size) to 5 times the original size, eased in, in a cubic manner.
alpha: { start: 1, end: 0, ease: "Cubic.easeIn" },
Alpha is the opacity of the particle. In this example, it is set to 'fade' from 1 (opaque) to 0 (transparent), eased in a cubic manner.
lifespan: 1500,
There is not much in the way of a detailed explanation given in the documentation, but it is probably exactly what it says - how long the particles live. In our example, it is set to 1500ms - probably too long but it is easier to see what is happening with the emitter.
blendMode: 3,
By setting the blend Mode, essentially you can set how particles are overlayed over each other as they are drawn. The definitions of the various modes available are as below from the documentation, but probably easier to experiment by changing the numbers and running the code yourself.
NORMAL (0): Normal blend mode. For Canvas and WebGL. This is the default setting and draws new shapes on top of the existing canvas content.
ADD (0): Add blend mode. For Canvas and WebGL. Where both shapes overlap the color is determined by adding color values.
MULTIPLY (2): Multiply blend mode. For Canvas and WebGL. The pixels are of the top layer are multiplied with the corresponding pixel of the bottom layer. A darker picture is the result.
SCREEN (3): Screen blend mode. For Canvas and WebGL. The pixels are inverted, multiplied, and inverted again. A lighter picture is the result (opposite of multiply)
frequency: -1,
Regarding frequency, the documentation simply states:
0 : One particle flow cycle for each logic update (the maximum flow frequency).
> 0 : The time interval between particle flow cycles in ms.
-1 : Exploding emitter.
In our example this is set to the "exploding emitter" which means that the emitter will fire once, as opposed to continue emitting streams of particles.
radial: false
The documentation states:
A radial emitter will emit particles in all directions between angle min and max, using Phaser.GameObjects.Particles.ParticleEmitter#speed as the value. If set to false then this acts as a point Emitter. A point emitter will emit particles only in the direction derived from the speedX and speedY values.
In our example, radial is set to false, and as you will see below, the speedX and speedY values will be set with reference to the velocity vector of the bullet that leads to the explosion.
Make the explosion 'explode'!
'Firing' the emitter can be done with emitter.emitParticleAt(x, y, count);
So for our example, the following one line will work.
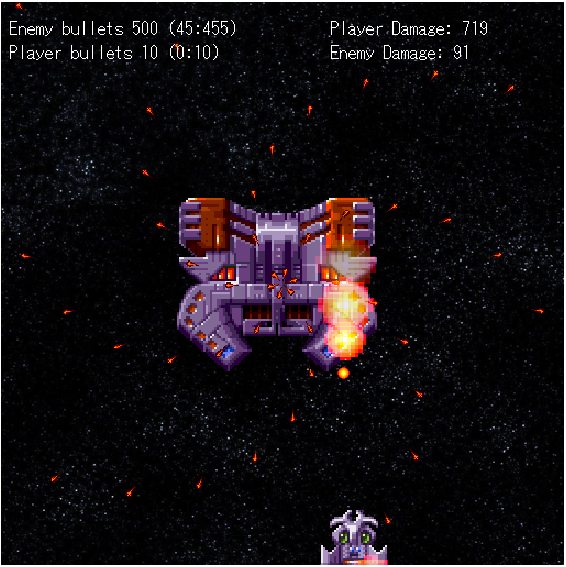
explosion.emitParticleAt(x, y); However, to make the explosion a little bit more dynamic, the particle object is given a little bit of velocity by reference to the bullet's velocity vector (need to set x and y components separately it seems). Hence you will notice that when a player bullet hits the enemy ship, the related explosion will shift up a little bit before disappearing, whereas when the enemy ship hits the player ship, the related explosion move slightly in the direction of the original enemy bullet that before disappearing.
explosion
      .setSpeedX(0.2 * _bullet.body.velocity.x)
      .setSpeedY(0.2 * _bullet.body.velocity.y)
      .emitParticleAt(x, y);
That's basically it
Just be a bit careful about depth of objects. Create the player before the particle emitter, otherwise the explosion will be rendered 'behind' the player.
You can experiment with using different images as ten different types of bullets are loaded from bullet1 to bullet10. With the more characteristically shaped images, you can see how the image is being scaled (to 5), and the alpha is being changed from 1 to 0.
The CodePen Pen is available below, for your perusal.


Comments