Phaser Coding Tips1&2 Revisited, Part 3: Falling Sand Simulation
- cedarcantab
- Mar 1, 2022
- 6 min read
Updated: Feb 9, 2024
Writing to the Canvas at Pixel Level
In the previous two posts, my primary motivation for manipulating the HTML canvas directly was to get pixel level data for the purposes of pixel level collision detection of the (essentially) static background. In the Phaser tutorial example conversion I did use canvas operations (drawing arcs) to blow holes in the landscape drawn on the canvas, but that was as far as it went.
In fact, Phaser 3 not only allows you to execute HTML canvas API's, it does offer a number of methods to write to the HTML canvas with more granularity.
By using such methods, I created a simple falling sand simulation.
getPixel(x, y [, out]) vs setPixel(x, y, red, green, blue [, alpha])
In the previous two posts, the key method I utilised was getPixel, which gets the color of a specific pixel from the canvas texture and store it in a Phaser color object. The color object contains the red, green, blue and alpha values of the particular pixel set in its r, g, b and a properties.
As you might expect there is a "write" equivalent of the above, called setPixel(x, y, red, green, blue, [alpha]), which sets a pixel in the CanvasTexture to the given color and alpha values. So you can write to the Canvas at pixel level using this method. However, Phaser's official documentation warns "This is an expensive operation to run in large quantities, so use sparingly". Hmm...
Looking through the phaser documentation, the following methods look more promising.
getData(x, y, width, height) and putData(imageData, x, y, [dirtyX], [dirtyY], [dirtyWidth], [dirtyHeight])
Of the getData method, the official documentation explains "Gets an ImageData region from this CanvasTexture from the position and size specified. You can write this back using CanvasTexture.putData, or manipulate it". And there is no warning about expensiveness of the operation! Indeed, looking at the underlying code of this method reveals that it is in fact the same as HTML canvas getImageData() Method. The getImageData() method returns an ImageData object that copies the pixel data for the specified rectangle on a canvas.
  getData: function (x, y, width, height)
    {
        x = Clamp(Math.floor(x), 0, this.width - 1);
        y = Clamp(Math.floor(y), 0, this.height - 1);
        width = Clamp(width, 1, this.width - x);
        height = Clamp(height, 1, this.height - y);

        var imageData = this.context.getImageData(x, y, width, height);

        return imageData;
    },
Accessing the pixel information from the returned object
The returned object is a normal Javascript array, with the four pieces of colour information for each pixel held sequentially. So for the first pixel, you can access the color information as follows:
red =   imgData.data[0];
green = imgData.data[1];
blue =  imgData.data[2];
alpha = imgData.data[3];
For a pixel at (x,y) of the image data, you need to do a bit of maths to get at the data at the right place in the returned object.
red =   imgData.data[((y * (imgData.width * 4)) + (x * 4)) + 0];
green = imgData.data[((y * (imgData.width * 4)) + (x * 4)) + 1];
blue =  imgData.data[((y * (imgData.width * 4)) + (x * 4)) + 2];
alpha = imgData.data[((y * (imgData.width * 4)) + (x * 4)) + 3];
You can change the above properties as you like, then write the manipulated image data back onto the canvas using the HTML canvas putImageData() method, for which there is a Phaser 3 method named putData(imageData, x, y, [dirtyX], [dirtyY], [dirtyWidth], [dirtyHeight]).
setPixel is a combination of canvas getImageData and canvas putImageData methods
Going back to the setPixel(x, y, red, green, blue, [alpha]) method that Phaser wants us to use sparingly, if you look at the code, it is actually a combination of getImageData and putImageData.
 setPixel: function (x, y, red, green, blue, alpha)
    {
        if (alpha === undefined) { alpha = 255; }
        x = Math.abs(Math.floor(x));
        y = Math.abs(Math.floor(y));
        var index = this.getIndex(x, y);
        if (index > -1)
        {
            var imageData = this.context.getImageData(x, y, 1, 1);
            imageData.data[0] = red;
            imageData.data[1] = green;
            imageData.data[2] = blue;
            imageData.data[3] = alpha;
            this.context.putImageData(imageData, x, y);
        }
        return this;
    },
As an aside, looking at the Phaser documentation, there is a "multiple pixels" version of the getPixel method, called getPixels([x], [y], [width], [height]). This method returns an 2d array containing the pixel object of the relevant pixels. It basically performs something similar to the getData method but the returned object is a 2d Javascript array so perhaps it is a little bit easier to handle.
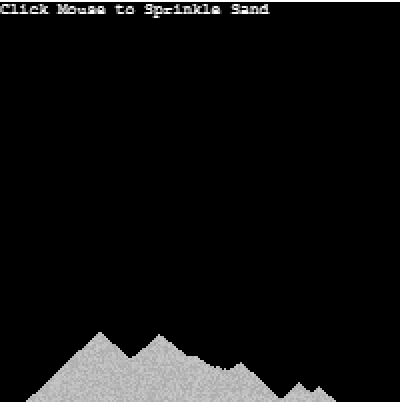
Falling Sand Simulation
I came across this genre while I was researching pixel level graphics. A falling sand simulation is a derivative of cellular automata. Those of you who dabbled with computer graphics in the 70's might have come across John Conway's Game of Life, which is probably the most famous example of cellular automata. More recently, I have learned that there is a game called Noita, which uses technqiues associated with this particular genre. I will not go into the details of sand simulations in my post since there is plenty of very good material on the web and this is a very deep field in which you could lose yourself for a very long time! However, for the purposes of my experiment, I have coded the most basic of sand simulations according to the following rules:
a sand particle will always attempt to move down one pixel
if a sand particle encounters another particle, it will attempt to go left or right
the process is repeated until the sand particle can no longer find any empty pixel (or hits the ground), in which case it will stay in the same pixel.
The code implements the simple 3 rules above using the Phaser methods referred to above. Rather than loop through the entire set of pixels of the screen, I created a new class object to represent a sand particle, with the basic logic to move the particle around.
class SandParticle extends Particle {
  constructor(scene, x, y) {
    super(scene, x, y);
    this.colour = [200, 200, 200];
		this.gradation = Phaser.Math.Between(0,30);
  }

  update() {
    this.clear();
    // first check the cell immediately below
    const targetCell = (this.isEmpty(this.x, this.y + 1) && this.y < SCREEN_HEIGHT-1);
    if (targetCell) { // if the cell immediately below is empty, move there
      this.y++
    } else { // otherwise move to the left or right (give it a bit of randomness if both sides are empty)
      const leftCell = (this.isEmpty(this.x - 1, this.y + 1) && this.x > 0)
      const rightCell = (this.isEmpty(this.x + 1, this.y + 1) && this.x < SCREEN_WIDTH - 1)
      if (leftCell & rightCell) {
        this.x += Math.random () > 0.5 ? -1 : 1;
      } else if (leftCell) {
        this.x--
      } else if (rightCell) {
        this.x ++
      }
    }
		this.render(this.colour[0] - this.gradation, this.colour[1] - this.gradation, this.colour[2] - this.gradation);
	}

}
Underneath this object class I created a base class called "Particle" which houses the very basic canvas type operations.
class Particle {
  constructor(scene, x, y) {
    this.x = x;
    this.y = y;
    this.imgData = scene.imgData;
  }

  isEmpty(x, y) {
    // returns true if the target cell is empty
    return (this.imgData.data[((y * (this.imgData.width * 4)) + (x * 4)) + 3] === 0)
  }

  clear() {
    this.imgData.data[((this.y * (this.imgData.width * 4)) + (this.x * 4))] = 0;
    this.imgData.data[((this.y * (this.imgData.width * 4)) + (this.x * 4)) + 1] = 0;
  	this.imgData.data[((this.y * (this.imgData.width * 4)) + (this.x * 4)) + 2] = 0;
  	this.imgData.data[((this.y * (this.imgData.width * 4)) + (this.x * 4)) + 3] = 0;
  }

  render(r, g, b, a = 255) {
    this.imgData.data[((this.y * (this.imgData.width * 4)) + (this.x * 4))] = r;
    this.imgData.data[((this.y * (this.imgData.width * 4)) + (this.x * 4)) + 1] = g;
    this.imgData.data[((this.y * (this.imgData.width * 4)) + (this.x * 4)) + 2] = b;
    this.imgData.data[((this.y * (this.imgData.width * 4)) + (this.x * 4)) + 3] = a;
  }

}
And in the main game class, the following code to update the particles and the screen every frame.
class Game extends Phaser.Scene {

  constructor() {
    super('Game');
    this.pixels = [];

  }

  create() {
    this.cozyWorld = new World(this, SCREEN_WIDTH, SCREEN_HEIGHT);
    this.texture = this.textures.createCanvas('canvastexture', SCREEN_WIDTH, SCREEN_HEIGHT);
    this.imgData = this.texture.getData(0, 0, SCREEN_WIDTH, SCREEN_HEIGHT);
    this.add.image(0, 0, 'canvastexture').setOrigin(0);
    this.pointer = this.input.activePointer;
    this.instruction = this.add.text(0, 0, 'Click Mouse to Sprinkle Sand', {fontSize: 8});

  }

  update() {
    if (this.pointer.isDown) this.sandCastle(this.pointer)
    this.cozyWorld.update()
  	this.texture.putData(this.imgData, 0, 0);

  }


  sandCastle(pointer) {

    if (this.pixels.length < MAX_PARTICLES) {
      const pixel = new SandParticle(this, Math.floor(pointer.x), Math.floor(pointer.y));
      this.cozyWorld.addParticle(pixel);

    }
  }

}
Of course, as far as the example code goes, there is pretty much zero reason why you would code this using the Phaser framework, rather than pure Javascript. In fact, you probably shouldn't be using the HTML Canvas to store the particles - probably quicker to store them in a normal JS Array. However, it illustrates how HTML canvas manipulation could be combined with Phaser's various game objects and even physics engines.
When and when not to manipulate HTML Canvas at pixel level
Clearly, I have only scratched the surface of things you can achieve by manipulating HTML Canvas at pixel level. As I mentioned in the first post, pixel based collision detection by checking the "color" of the pixel everytime an object is drawn makes a lot of sense for "retro-games" where the objects are simple, easily distinguishable in some way and do not move too fast. In particular, it made a lot of sense beacuse screen resolutions were so low (space invaders screen resolution being 224 x 256). I understand that the original Worm game used pixel-by-pixel approach (rather like in the original Phaser 2 tutorial) but later games used more sophisticated methods. In that regard, note to my future self to look into Run Length Encoding (RLE),
Anyway, here's the Codepen for your perusal and comment.
Useful References

Comments