Phaser Coding Tips 8 "Sprite Motion Paths Tutorial" Revisited, Part 2
- cedarcantab
- Mar 29, 2022
- 7 min read
Continuing on from the previous post about my exploration of Phaser 3's capabilities to generate splines and motion paths, this post is about Phaser.Curves.Spline (generates - as the name suggests - a spline) and Phaser.Curves.Path classes and the PathFollower object.
Phaser.Curves.Spline
First, please take a look at the CodePen below.
(Coding Tips 8, Part 2.0)
It achieves exactly the same result as the last Codepen in the previous post, with the addition of the alien rotating to face the right direction.
The key part of this example is following code in the create method. this.path object and the tween should now be familiar from the previous post.
this.curve = new Phaser.Curves.Spline(this.points);

this.plot();
this.path = { t: 0, vec: new Phaser.Math.Vector2() };
    this.tweens.add({
        targets: this.path,
        t: 1,
        ease: 'Linear',
        duration: 5000,
        repeat: -1
});
The red line creates a Phaser.Curves.Spline object. The official documentation says that Phaser.Curves.Spline Create a smooth 2d spline curve from a series of points. Specifically, it is creating a curve object using CatmullRom method. With this method, you cannot choose the function (like Linear or Bezier) to create the curve. In essence, this object encapsulates the array of x/y points and the interpolation calculations explicitly coded in the examples of the previous post.
and in the update method, the following lines moves the sprite along the Spline.
  update(time, delta) {
    this.curve.getPoint(this.path.t, this.path.vec);
    this.alien.setRotation(this.curve.getTangent(this.path.t).angle());
 //   this.curve.getPointAt(this.path.t, this.path.vec);
 //   this.alien.setRotation(this.curve.getTangentAt(this.path.t).angle());

    this.alien.setPosition(this.path.vec.x, this.path.vec.y)
  }
getPoint method gets the coordinates on the path at t and assigns that coordinate to the vec property of this.path object, and setPosition method sets the alien at that position. Simple as that.
With the above methods it becomes a lot easier to move sprites along a path. Let's look in more detail into how splines are created:
How to create a Spline object
The curve object is created by passing the points to the Phaser.Curves.Spline method, as follows.
this.points=[[30,300],[130,270],[260,100],[380,120],[510,340],[610,280]]
this.curve = new Phaser.Curves.Spline(this.points);
The Spline method is written in such a way as to accept the points in different formats. In the above example, it is an array of arrays, with each array representing [x,y].
In addition, the same can be achieved by;
this.points = [30,300,130,270,260,100,380,120,510,340,610,280];or,
    this.points = [
      new Phaser.Math.Vector2(30,300),
      new Phaser.Math.Vector2(130,270),
      new Phaser.Math.Vector2(260, 100),
      new Phaser.Math.Vector2(380, 120),
      new Phaser.Math.Vector2(510, 340),
      new Phaser.Math.Vector2(610, 280)
    ];
In fact, it seems to accept other vector like objects which has an x and y property, such as below.
   this.points = [
      new Phaser.Geom.Point(30,300),
      new Phaser.Geom.Point(130,270),
      new Phaser.Geom.Point(260, 100),
      new Phaser.Geom.Point(380, 120),
      new Phaser.Geom.Point(510, 340),
      new Phaser.Geom.Point(610, 280)
    ];
In the Phaser 3 examples site there is simple but very effective spline builder to allow you to create your own splines, here.
The Spline class provides a variety of useful methods. Particularly useful for debugging is daw(graphics [, pointsTotal]) method which can be used to "draw" the spline (note you should specify the pointsTotal if you want to draw the curve at a higher "resolution" than the default 32)
You can also access directly the points used to create the spline, via the points property so you can easily plot the points just like in the original tutorial example, should you so wish.
As an aside, a spline object is made up of "segments" (interchangeably called "divisions"). Two particular properties gives some clues as to how the internal machinery works:
defaultDivions (set to 5): The default number of divisions within the curve.
arcLengthDivisions property: the number of divisions (by default 100) that the curve is divided into for the purpose of calculating the curve's overall length.
But what of the speed of alien movement?
If you run the code you it looks like the alien is moving faster when it is "ascending" and "descending" the big slopes, even though t is being tweened linearly. This is (probably - I haven't checked the underlying code) due to the way CatmullRom interpolation creates the entire curve, segment by segment, with each segment having their t range from 0 to 1, irrespective of their "length" and the way getPoint method calculates "pro-rate" the t to the relevant segment.
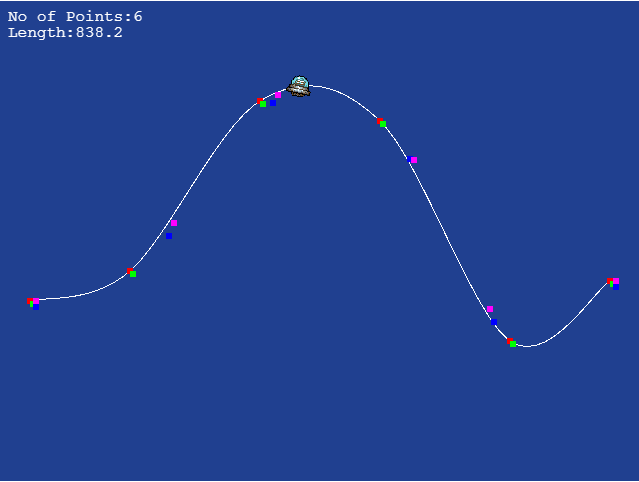
To give us an understanding of what's happening, I plotted points at t=0, 0.2, 0.4, 0.6, 0.8 and 1.0 in GREEN - and they coincide exactly with the points used to configure the spline (in RED). It's difficult to explain precisely what's happening in words, but you can imagine what might be happening. I have also plotted in BLUE, points obtained using the getSpacedPoints( [divisions] [, stepRate] [, out]) method which is supposed to "Get a sequence of equally spaced points (by arc distance) from the curve". For good measure, I have plotted in purple points obtained using the getPointAt(u [, out]) which is suppoed to get a point at a relative position on the curve, by arc length - this seems to give the same result as getSpacedPoints method.
Hence, it is clear that you cannot move the alien at a constant speed simply by incrementing t linearly and using getPoint.

On the other hand, because Phaser 3 provides you methods for getting equally spaced points, you can move the alien at constant speed simply by making the following replacements:
this.curve.getPoint -> this.curve.getPointAt
this.curve.getTangent -> this.curve.getTangentAt
Given that you also know the total length of the curve, you could even specify the speed at which you want the alien to move at by setting the duration of the tween with reference to distance / speed.
Of course, by basing the whole thing on a tween which sets the total duration of traversing the path, it might be easier to rethink the structure of the code if you want to change the velocity or have acceleration etc.
More complicated paths?
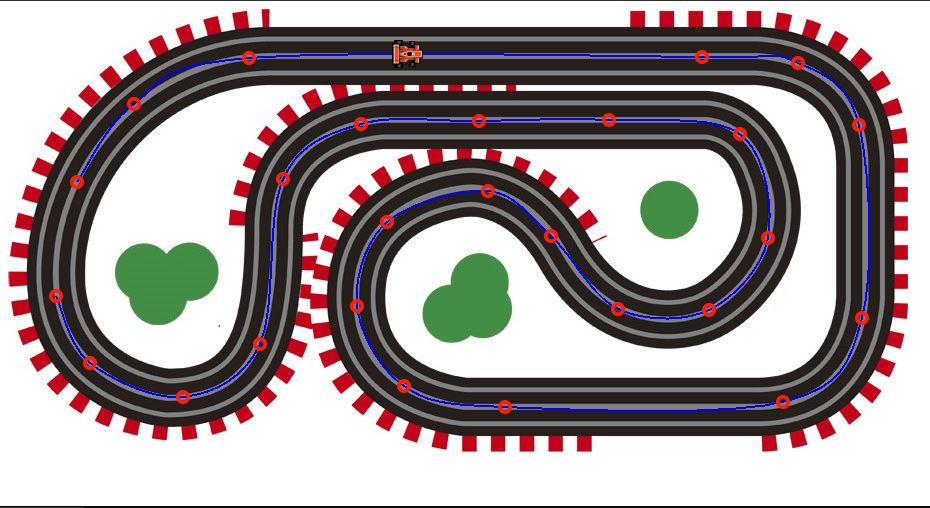
As stated above, the Phaser.Curves.Spline method is very powerful but you are limited to generating curves off a set of points using CatmullRom. CatmullRom is extremely easy to handle and with practice can create pretty much any curve. However, whilst is is very good at generating smooth curves, it can be a bit tricky to create paths which combine curves and straight lines. For example, I created the following "race track" in a very short space of time using the Phaser example spline builder referred to above. However, if you look closely at the spline (the blue line represents the spline and the red doughnuts the control points), you can see that the spline is slightly curved in the "straights".

Phaser.Curves.Path
Other ways to create splines / paths?
What if you wanted more precision in creating paths? In fact, Phaser offers functionality to create paths with a lot more granularity should you want it. Phaser 3 provides many different methods to create curve objects, like CubicBezier, QuadracticBezier, Ellipse etc., which create separate curve objects.
And, you can combine multiple curve objects into one using Phaser.Curves.Path, which is described by the official documentation as follows:
A Path combines multiple Curves into one continuous compound curve. It does not matter how many Curves are in the Path or what type they are.
Again, there are many examples on the official Phaser site here that illustrate how Curves.Path objects can be created. In fact, a Phaser.Curves.Spline object can be "converted" into a Phaser.Curves.Path object very simply with the following object.
this.curve = new Phaser.Curves.Path(30,300);
this.curve.splineTo(this.points);
With the splineTo method, the first point of the spline is always the last point of the Curves.Path object and hence, with respect to the this.points object above, the first point should be deleted.
Phaser.Curves.Path object is an Javascript Array
Although Phaser.Curves.Path object looks like 1 "joined-up" curve, it is in fact, quite literally, a Javascript Array of separate Phaser curve objects where the end point of the "previous" curve overlaps with the starting point of the "next" curve. When the curves.path object is first instantiated with a {x,y} that is assigned to a property called startPoint. This is not the same as the first point of the first curve (although typically they would overlap).
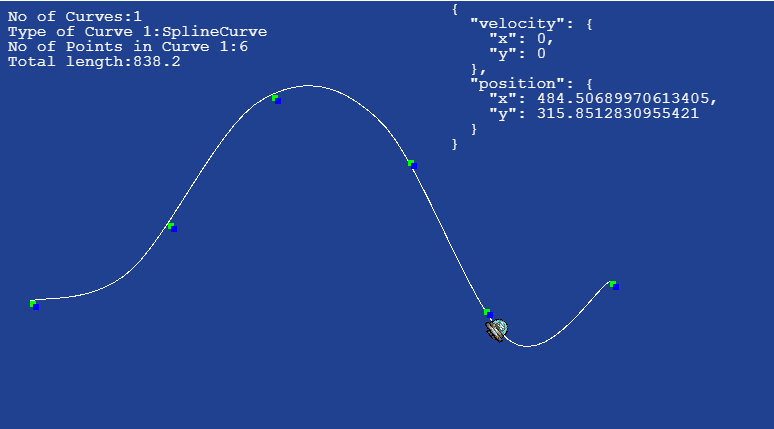
The array itself is included in a property called curves. Hence you can manipulate the individual curves making up the path object simply by this.path.curves[x] (this.path being the curves.path object). As you can get the individual curve object, you can then use the methods relevant to that specific curve, like below:
this.path.curves[x].type --> will give you the type of curve as a string, like "SplineCurve"
this.path.curves[x].points --> will give you the points making up the spline curve (if the curve is a spline curve)
If you are going to start manipulating the individual curve objects after the curves.path object has been created, you should always remember that there are distinct curves objects making up the single curves.path object. As the curves.path object is just a bunch of curves in an array, you can actually have curves that do not join up, making up a single curves.path object.
Moving game objects along a Phaser.Curves.Path with tweens
As mentioned above, a Phaser.Curves.Spline object can be converted into a Phaser.Curves.Path object very easily. This below example does exactly that, and and uses tween and getPoint to move the alien along the same CatmullRom spline that we have been playing with in prior examples.
(Coding Tips 8, Part 2.1)

The code is literally, a copy of the example code 2.0, except that the path is now a Curves.Path object as opposed to Curves.Spline object. And yet, the alien is clearly moving at a more stable speed, in contrast to the first example where the alien changed speed at various points along the curve. This is because getPoint method of the Curves.Path class is not the same as getPoint method of the Curves.Spline class.
The getPoint(t [, out]) method of the Curves.Path class is explained as follows:
"Calculates the coordinates of the point at the given normalized location (between 0 and 1) on the Path. The location is relative to the entire Path, not to an individual Curve. A location of 0.5 is always in the middle of the Path and is thus an equal distance away from both its starting and ending points."
This seems to suggest that this is akin to getPointAt, of the Phaser.Curves.Spline class. And indeed, there is no getPointAt for the Phaser.Curves.Path class.
As an aside, you will also note that the velocity of the physics body is constantly zero. This is because we are using the tween to set the x/y coordinate of the game object directly, and not by setting the velocity via the physics engine.
The power of Cubic Bezier curve
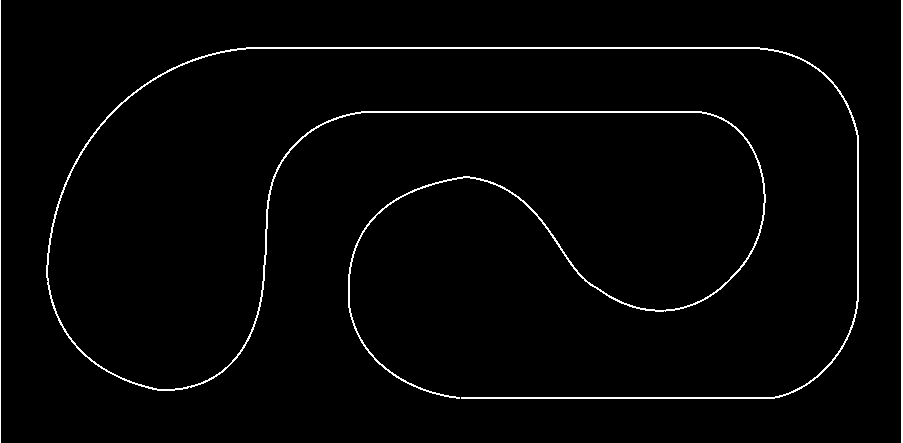
Having experimented with the various Phaser curve objects, my personal conclusion is that a combination of straight lines and cubic bezier curves pretty much gives you all the flexibility you need. I recreated the above race circuit example using only lines and cubic bezier curves - even with my severely limited artistic talents, I was able to create below in a very short space of time.

Specifically, the above path is made up of 16 "curve objects" (I'm sure those more adept at this could do it in less), where the startpoint {460, 398} is the same as the end point so it forms a closed path. And according to Phaser's getLength() method, the total length of the path is 3388.28942948852 (I assume the unit is pixels).
Another very useful feature of Phaser's Curves.Path class is that it offers a method to: (i) write the path object to a JSON file, and (ii) read a JSON file to create a path object, which certainly helps in reducing clutter in your main code, particularly if you want to have lots of paths.
As this post is getting a bit long, I will stop here, before moving onto describing the Path Follower object in the next post.


Comments